Then I thought I'd whip up some more and write a tutorial while I was sewing so you could make some for yourselves. So here's my...
SNOWMAN MUG RUG TUTORIAL
Materials for one mug rug (approximately 9" square when finished):
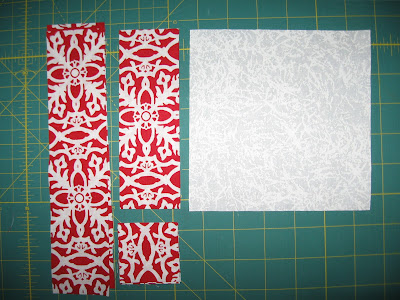
- 1 - 6" square white fabric
- 4 - 2" squares red or green fabric
- 2 - 2" x 6" strips red or green fabric
- 2 - 2" x 9" strips red or green fabric
- Small scrap of orange fabric for nose and Heat n' Bond (or other applique adhesive)
- 1 - 11" square of quilt batting
- 1 - 12" square of backing fabric
- 1 - 2 1/4" x WOF strip fabric for binding
- 2 small, flat black buttons for eyes
Step 1:
Sew 2" squares of red fabric to corners of 6"" white square.
Step 2:
Trim corners 1/4" away from stitching.
Step 3:
Press corners outwards with seam allowance towards red fabric.
Step 4:
Sew 6" strips of red fabric to opposite sides.
Step 5:
Press outwards with seam allowances towards red fabric.
Step 6:
Sew 9" strips of red fabric to other two sides.
Step 7:
Press outwards with seam allowances towards red fabric.Step 8:
Make triangular-shaped nose from orange scraps; bond and applique (I used blanket stitch) to middle of white square.
Step 9:
Layer 12" square of backing fabric, quilt batting, and top. Baste (I used 505 Spray for this job) and quilt as desired.
Step 10:
Trim to 9" square and apply binding using your favourite method. I like to use Anita's binding tutorial, found here.
Step 11:
Sew on button eyes to create a unique expression for your snowman.
Step 12:
Enjoy a mug of hot chocolate and maybe a cookie or two on your new mug rug!
For maximum enjoyment, repeat Steps 1 through 12 and create more Snowman Mug Rugs for gift-giving.
I'm also thinking that a whole quilt made out of these blocks would be adorable


34 comments:
Those are so cute! And what a quick project too. And thanks for the great tutorial.
Very cute!!! Thanks for such a nice tutorial.
Love these! Thanks for the tutorial. Think I will be making some very soon.
Oh my goodness... how cute are those snow people! What a wonderful idea... and you can use them past the holidays too!!!
Thanks for the tute! These are super cute!
Thanks Rachel! A whole quilt or wall hanging out of snowmen heads would be adorable!!!
Just tooo cute....and loved the tutorial!!
those came out adorable! how fun
Very very cute Rachel!!!!! I love it.
What a fun and happy snowman! Thanks for sharing the tutorial. They'd make great gifts for co-workers!
They're adorable Rachel -- thanks for sharing the how-to!
Thanks for this tutorial. I can't wait to try these.
so cute!! thanks for sharing your tutorial!
Super cute! Wonderful TUT ..thanks for sharing your cute idea!
they are adorable how cute... I hope to find time to make some this year... But then there is always next year... LOL
Hugs
Susan
These are so jolly! We are all at it with our Christmas crafts aren't we! I'm having a festive tutorial and giveaway tomorrow - I hope you will be able to join in.
Great tutorial and a very cute result !!! Although at my house those snowmen would only stay white for about a second before something was spilled on them! :-)
Adorable - thanks for the tute!
That is so cute and would make great gifts for teachers!
very cute!! Thanks for sharing the tutorial too.
Will put this tut on the top of my to-do list when I get home. How cute. Maybe I will get some Christmas sewing done. Thanks for sharing. Sugarland Quilt.com
Darling. Thank you!
Just found your blog and now I am a follower.
This is very cute and I think a whole quilt is the perfect ticket also.
TFS.
Thanks for this adorable tutorial - I whipped up some today - just in time for some last minute gifts! Great idea - thanks again!
SUPER cute :)
This is adorable! Great instructions! Thanks so much!
"Snow"Very Cute!!! Thanks for the great tutorial...I just might have to start working on Christmas now too - these would be perfect for my Snowmen loving friends!
I'm late finding these, but I love them! They are so easy! I must make some.
Love this pattern. I just wish it was crochet :). Wanted to let you know I featured you tutorial on my blog today at http://lazydaisycrochet.blogspot.com/2012/08/monday-funday.html
Very cute Rachel! I think these would be a cute gift for my sewing group! Thank you so much for sharing!
Thanks for the tutorial. I'm way late in finding it, but did, thanks to Craftsy and Cindy at Adventures of the Singing Quilter.
Thanks for the tutorial for these mug rugs. So cute. It's snowing here so I think I snowman..mug rug style ~
Cute idea and I would like to know what seam allowance you used.
Love these little mug rugs.mthanks so much!
Post a Comment