

"Washi" means Japanese Paper, and it is a strong, wood pulp-free paper made without chemicals. It is used for origimi and many other paper crafts. It's quite easy to find in stores such as Michael's.
Today, I'm going to show you how to make Washi Eggs. They're great for Easter decorating, but I keep mine out all year because they are so beautiful!
First, we'll gather our supplies:

Washi (one sheet per egg)
Tape Measure
Ruler
Pencil
Eraser
Sharp Scissors with a pointed tip
Cellulose/Rice Glue or Elmer's diluted with water
Water-based varnish
Paintbrush
Eggs - blown out, rinsed, and thoroughly dried
Wine (or tea, coffee, water) - this is going to be a relaxing and enjoyable craft so create your atmosphere
Step 1:
Measure around the middle of egg. Add 1/2 cm to this measurement and mark the total on paper.

Step 2:
Measure around the egg, end to end. Take half of this measurement and mark on paper.

Step 3:
Cut paper to correct rectangular size.

Step 4:
Find the centre of the short sides of the paper. Mark 1/2 cm above and below the centre point on either short end. Connect the marks to draw two lines across the length of the paper to create a centre strip. Your markings should be as light as possible.
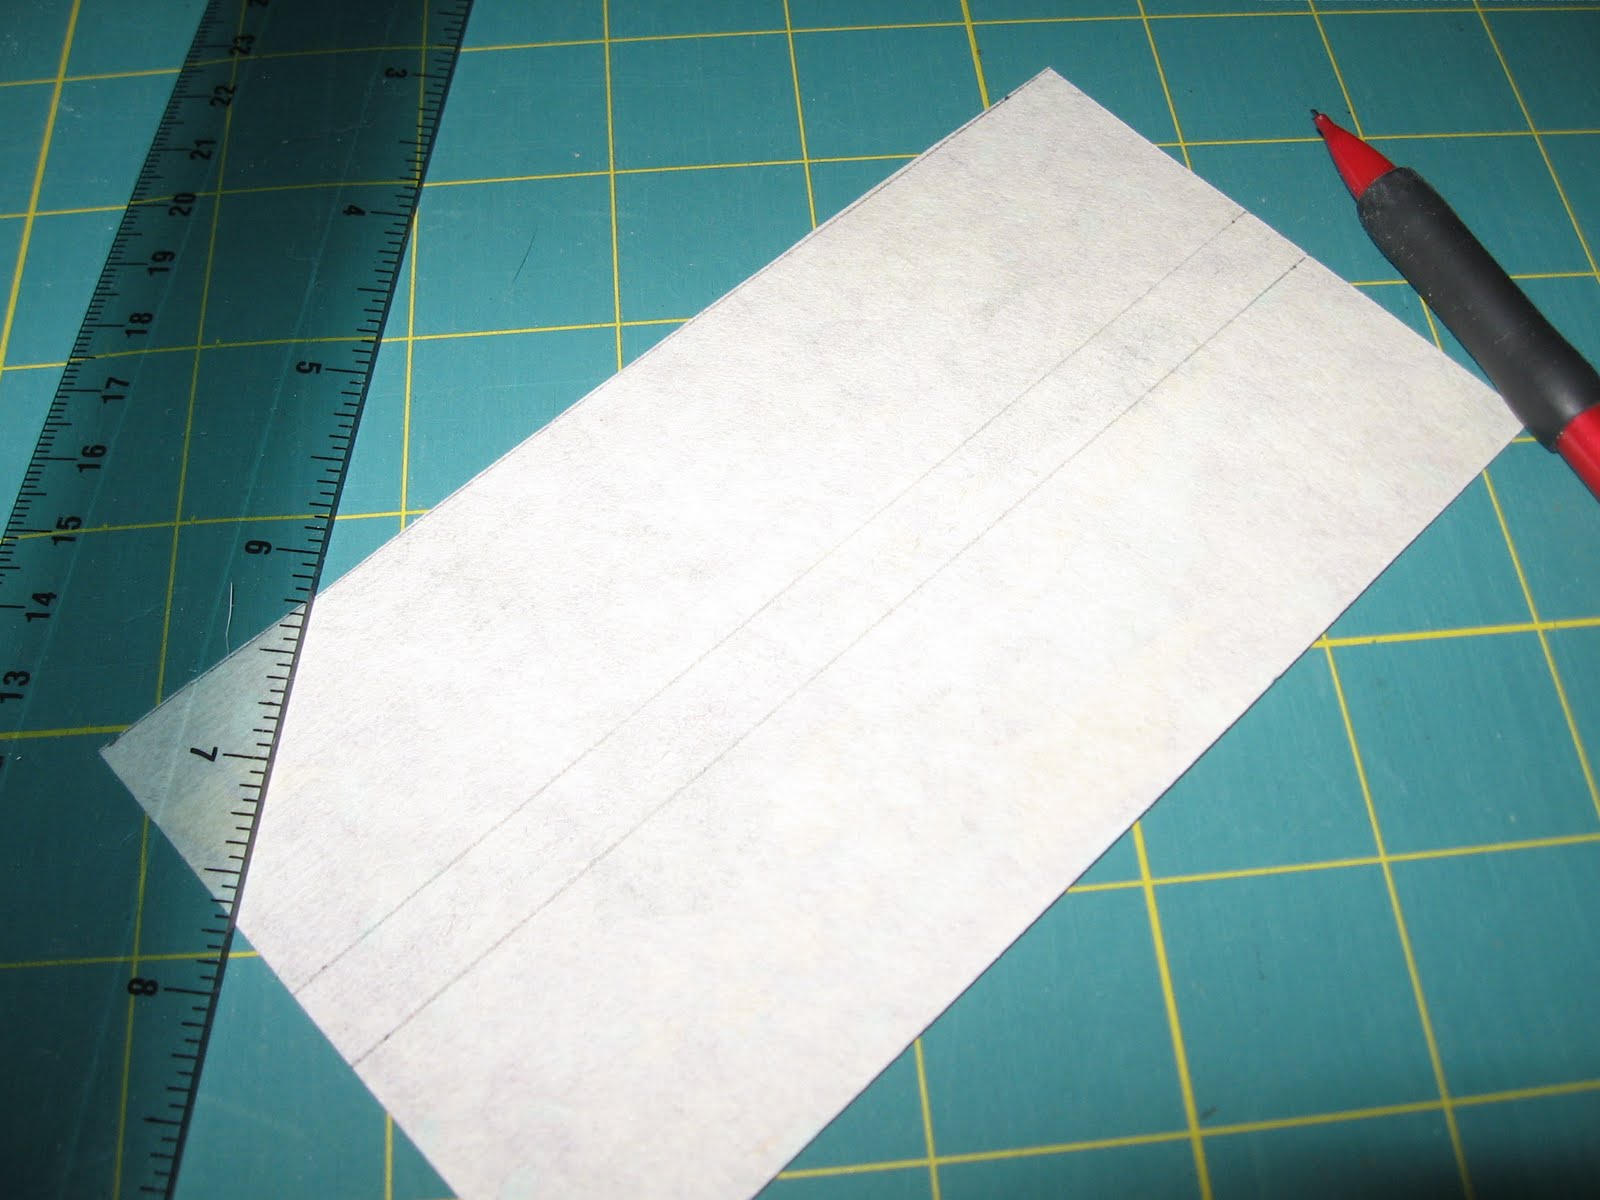
Step 5:
Draw two more lines on the paper, each one 1/2 way between the edge of the paper and the centre strip.

Step 6:
Along the long edges of the paper, measure and mark lines 1/2 cm apart.

Step 7:
Cut points resembling a picket fence on each side, from edge to first line.

Step 8:
Cut rest of line between points up to centre strip. Do NOT cut into the centre strip. When you have all the cuts made, gently erase all the lines you can still see.
Now take a sip of wine before the next step.

Step 9:
Mix your glue. Remember, a little goes a long way! Using your fingers, apply your glue to the wrong side of your paper. Coat the entire paper. Be gentle; you don't want the Washi to tear. When the paper is coated with glue, begin applying to the egg. Centre paper on egg and smooth down a few flaps of paper on each end of the egg, one at a time so they overlap slightly. Continue around the rest of the egg, smoothing from the centre to each end with fingers to eliminate air bubbles and creases. Make as smooth as possible.

Step 10:
Carefully cut off any excess paper and smooth the seam with the back of a spoon or your fingers. Let dry. (I knew all those empty spools I was throwing in a mason jar would come in handy.)

The top will look like a star.
While you're waiting for this egg to dry, make another one. Then another. They're a bit addictive.

Step 11:
Varnish with acrylic, water-based varnish, using a brush. Apply 5-10 thin coats and let dry at least 1/2 hour between coats. Apply no more than 4 coats/day.
This is the brand I used - Jo Sonja's. I bought the bottle eons (at least 15 years) ago and I still have about 1/3 left. Like the glue, a little goes a long way. Another brand that is recommended is "Rock".

When you have a collection of Washi eggs, you can display them.
I've made many of these. Some were eaten by AbbyDog and a few others were broken by my clumsy and unapologetic nephew. Some of mine were made with hand-painted paper (plain Washi that I embellished with paint swishes). And last night I made one using part of a map of Texas. I didn't realize until I had it all done that I'd applied the map upside down. Oh well.

Here they are in a big vase on my dining room table.

And another shot. Not great pictures, because of the afternoon sun, but pretty nonetheless, especially sitting on my Spring Spell table runner.

I hope you decide to try this little project. It's fairly easy and these eggs make beautiful gifts. I have a set of smaller, Bantam chicken eggs that I made into Christmas ornaments with red and green Washi. But Easter is the time that they are really appreciated.
If you make some Washi Eggs, please let me know. I'd love to see them!
13 comments:
Beautiful Easter project, Rachel! Thanks for the tutorial. I may have to try this.
Wow Rachel -- these are really cool. If you say they're easy, I'll believe you, but they look like they're time consuming. Thanks for sharing the tutorial -- I think I might even have some of that JoSonja's stuff in my paint supplies (and mine is probably as old as yours LOL)!
These are just amazing.....I love them!!! Thanks for the tutorial, it was great!!
What a great project! Maybe when Amelia is older and has more of an attention span, we will give these a try.
Yes, they can get quite addictive with or without the sip of wine. And.. they keep coming up with lovely washi paper that you just have to try.
Those are incredible. I think I will give them a try with your great tutorial. Thanks.
Bit more expensive but I did this with paper mache eggs and wrapping paper with young children. Not such a neat finish but 10 years later they still come out for Easter and only one of the 15 we did has been damaged - younger sister tried to eat it!
The eggs are super strong and really light weight.
How beautiful! But I am afraid to say I'm probably WAY TOO LAZY to make those. I'll just have to pop back over here and enjoy yours.
what a fun project! I may have to give these a try....
Thank you so much, I moved to Japan this past year and seen all the beautiful papers but was not sure what to do with it. Looking forward to starting this project
Thanks again
I've started this hobby last year and believe me, I'm hooked!You are right, its addictive. I give my washi eggs as gifts to friends. They loved it so much that I started to get orders from them. I started with chicken eggs, then duck eggs, and then turkey eggs. My latest project is wrapping an OSTRICH EGG in washi paper. It is really fun!
My only problem though is getting a glossy image. If i use a clear gloss spray, I end up with bubbles on the egg. If i apply a clear gloss using a brush, i dont get a smooth finish. Where can I find that brand of water-based clear gloss that you are using? is it available here in the Philippines? What other brand can you recommend that I can find here in our country
Good evening...
I am looking to combine a couple techniques... I hollowed out my egg and am planning to give it to my beloved with it contain a short sentence professing my love. I was going to simply paint my egg and "bejewel" it when i came across your blog. I wonder, can you use any kind of paper or does it have to be Washi paper? I would like to put a photo of us on paper and use it. Think i can?
Thank you for this post, it's amazing. I was wondering if I would be able to use another type of paper? I want to try to put a photo of a loved one on paper and apply it to the egg... Gift ideas and such.
Post a Comment